When the actuator introduced, the first thing came into my mind – What if we have a common place where I can see my all applications endpoints and I can manage them from there itself?
Thanks to the code-centric team they make this possible. if you are not aware of the Actuator, I would suggest you to first read about the actuator library.
Managing application using actuator endpoint is quite difficult, because if you have bunch of applications you won’t have a common place to see them all. But now with the help of Spring boot admin, it’s easier to view the dashboard for multiple microservices at a single place.
In this articles I’m going to describe you basic example of Spring boot admin client and server. CodeCentric has Introduce Spring boot Admin Server and it has inbuilt UI Dashboard that show the clients details. Isn’t it really amazing where you can see all your available clients at one place? Let’s see how we can implement this.
How it works?
Let’s do server and client setup
Spring boot admin server setup
First go to spring initialiser and generate sample project
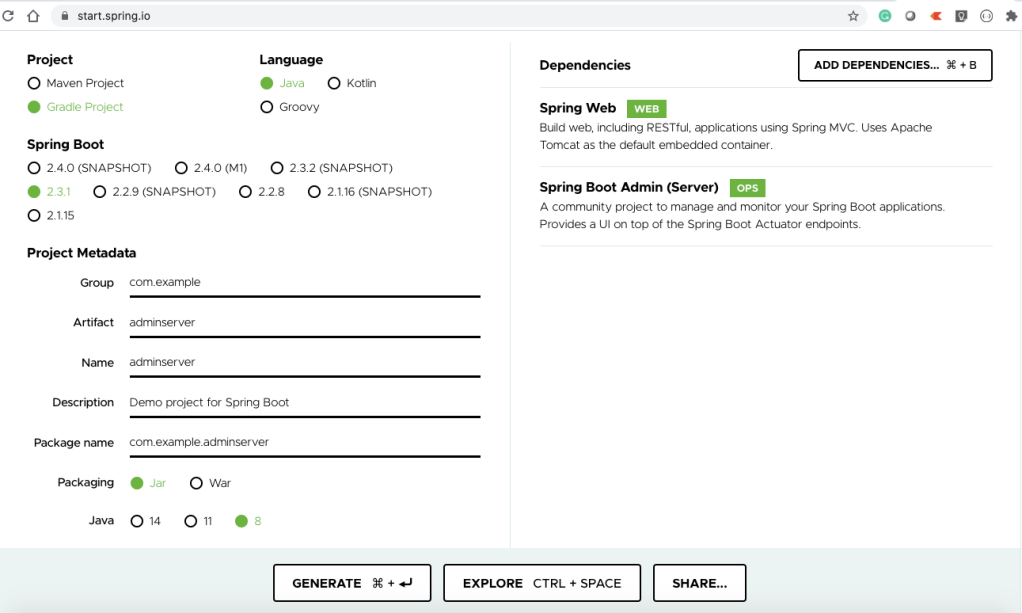
Once project generated you will find below dependencies into your build.gradle file.
'de.codecentric:spring-boot-admin-starter-server'Now let’s enable Admin server in project using @EnableAdminServer annotation
@SpringBootApplication
@EnableAutoConfiguration
@EnableAdminServer
public class SbadminserverApplication {

	public static void main(String[] args) {
		SpringApplication.run(SbadminserverApplication.class, args);
	}

}
Logically dashboard should be secure, So let’s include basic authentication using Spring Security
implementation 'org.springframework.boot:spring-boot-starter-security'
import org.springframework.context.annotation.Configuration;
import org.springframework.security.config.annotation.web.builders.HttpSecurity;
import org.springframework.security.config.annotation.web.configuration.WebSecurityConfigurerAdapter;

@Configuration(proxyBeanMethods = false)
public class SecuritySecureConfig extends WebSecurityConfigurerAdapter {

    @Override
    protected void configure(HttpSecurity http) throws Exception {
        http.formLogin().loginPage("/login").permitAll();
        http.logout().logoutUrl("/logout").permitAll();
        http.csrf().ignoringAntMatchers("/actuator/**", "/instances/**", "/logout");
        http.authorizeRequests().antMatchers("/**/*.css", "/assets/**", "/third-party/**", "/logout", "/login")
                .permitAll();
        http.authorizeRequests().anyRequest().authenticated();
        http.httpBasic(); // Activate Http basic Auth for the server
    }
}
Now assign default password to your server, if we don’t define Spring security password it will generate a random password at runtime and you can see the generated password in console.
spring.security.user.name=admin
spring.security.user.password=admin
If you want to update server ‘Titles’ you can use below properties.
spring.boot.admin.ui.title=AdminConsoleSpring boot admin client setup
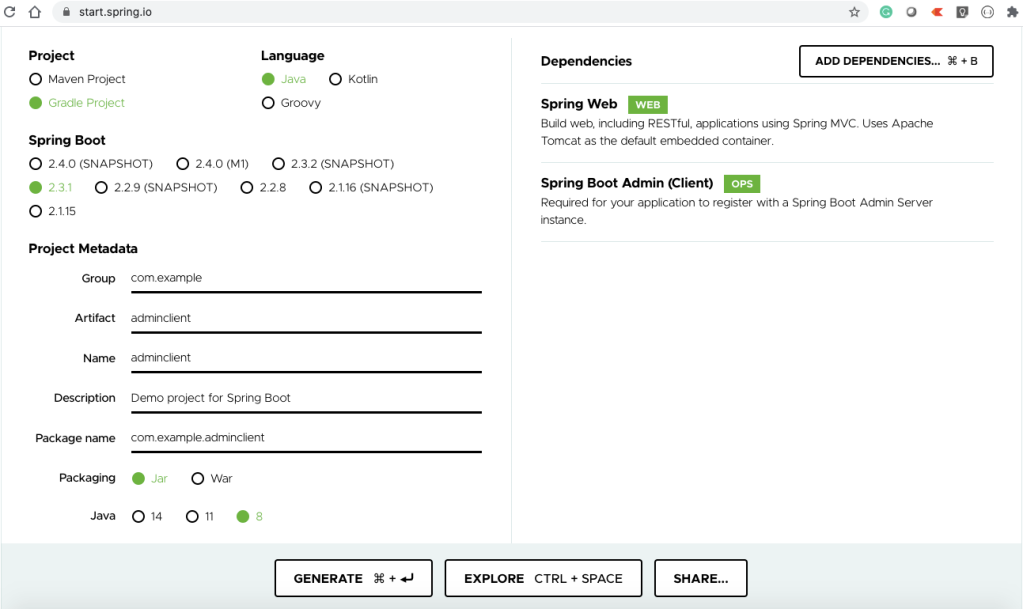
Generate client project
Once the project generated, configure server details into client properties files, make sure if you running both on the same machine, the port should be different to avoid a port binding error.
spring.application.name=sb-client
server.port=8888
management.endpoints.web.exposure.include=*

spring.boot.admin.client.url=http://localhost:8080
spring.boot.admin.client.username=admin
spring.boot.admin.client.password=admin
Now run both of the project and login into the server.
Summary : If you are looking for a prebuilt dashboard for your microservices, you can consider it one of the options. As this project is under an open-source umbrella you can update some of the features as per your requirement.
Hope you like this 🙂
Follow @nikeshpathak
Nice article,
I want to ask why my Spring Boot Admin Not Show Login Page?
https://github.com/hendisantika/SpringBootAdminDemo
Thanks
LikeLike